Saturday, December 08, 2012

Spiced Nuts

{So I meant to post this recipe before Thanksgiving, but I had some issues with blogger, and by the time I sorted it out, well as you can see, it is past Thanksgiving.  Hopefully some of you might enjoy making these still; they are delicious!)

Every year before Thanksgiving I find myself in the kitchen making up a recipe (or two or three) of these crunchy, sweet yet spicy nuts.  I thought I would share this family favorite with you all, and who knows maybe it will become a favorite of yours too!
{1} 
Preheat the oven to 300.  
Then grease 2 large edged cookie sheets with shortening or butter (who am I kidding, use butter!!)

{2}
 In a medium bowl measure in a cup of sugar. (the swirly design is optional, but rather fun :)
{3}
Now add 4TB of Cinnamon (also know as a 1/4 cup...) and a 1/4 tsp of Nutmeg. (alright, so the recipe calls for a 1/4 tsp, but as you can see in the picture I splurged with a scant 1 tsp) Set aside.
{4}
Separate 2 eggs putting the whites into a small/medium bowl, and the yolks into a dish to save and use in some other recipe.  Lightly beat the egg whites with a fork.
{5}
 Measure 1 cup of Pecans and 1 cup of Almonds into a large bowl. (I have never tried any other nuts, but feel free to experiment if you so desire)
{6}
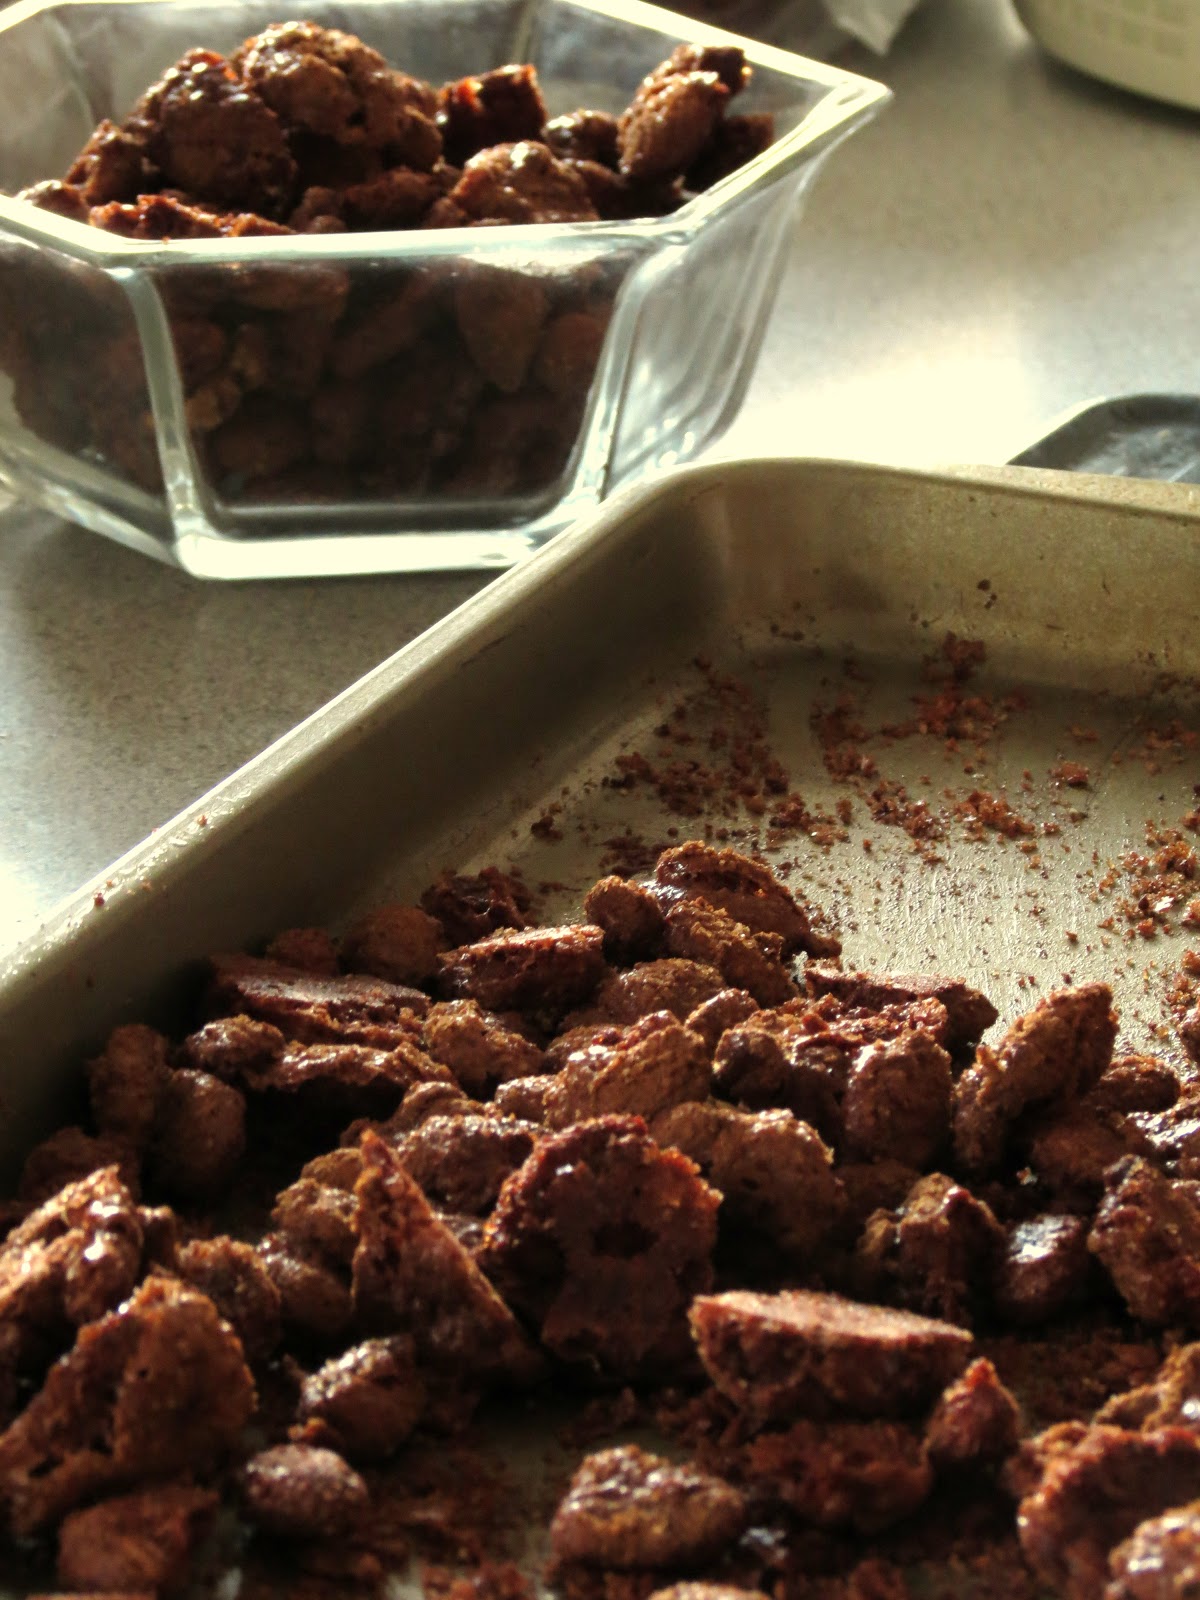
Now stir a few nuts into the egg whites, then using a slotted spoon lift them out and dump then into your sugar/spice mixture.  Mix around until the nuts are coated, then scoop them out and place them onto your greased pan.  Repeat until all the nuts are coated and on the pans.
{7}
Bake the spiced nuts for 20 minutes.  
(don't panic if you happen to forget about them and they stay in for..say.. 30-40 mins. while I don't recommend it, because of the low temp. they will dry out rather then burn.  And yes I am speaking from experience :)
Allow the nuts to cool and then serve in a pretty glass dish.

ENJOY!!!

~Chs

Wednesday, December 05, 2012

The Garden Tunnel

How would you like it if you could go out to your garden on a snowy, winter afternoon and pick some fresh lettuce for your supper?  Well, you can!  And very easily too!  No need for constructing a detailed cold frame or expensive greenhouse.  With some wire, plastic and string, you can build a simple garden tunnel to keep those cool weather loving crops thriving all winter long.  
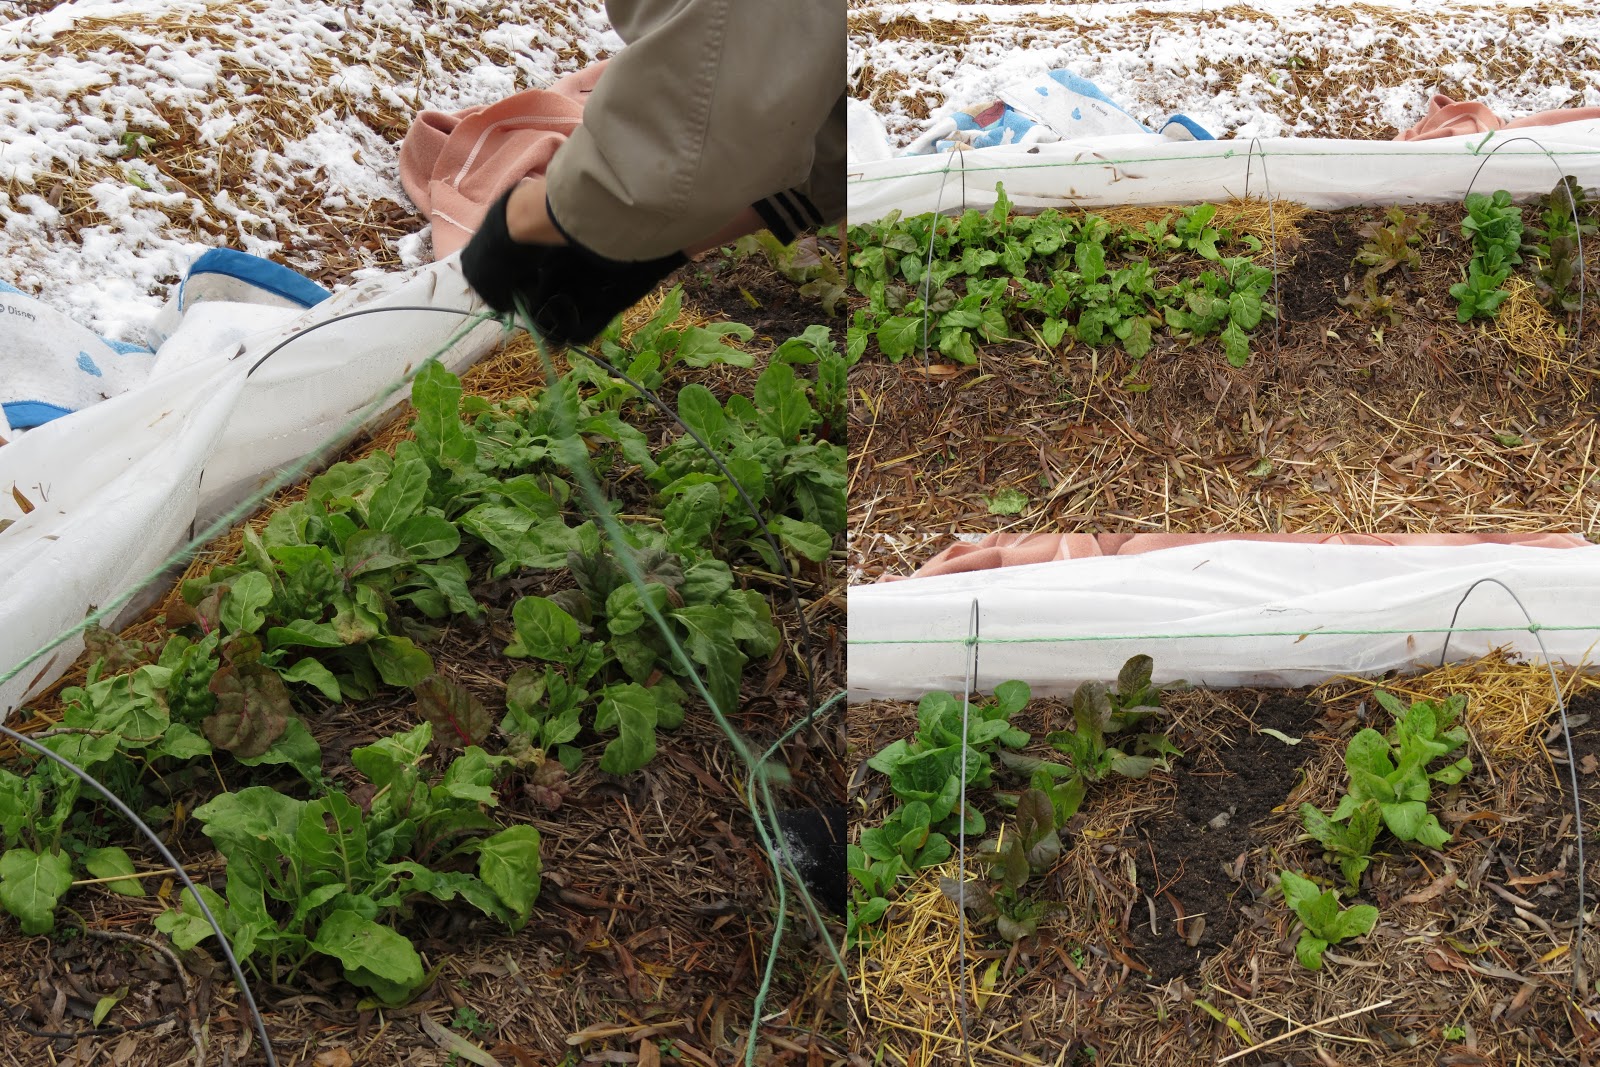
Here is some happy little Cos lettuce in my tunnel.  This was after a few below-freezing nights, including one that got down to 15º!  I have found that the Cos (romaine), and Bib or Butter-crunch varieties are better for winter gardens.   The leaf lettuce like Black-seed Simpson, seem to get a bit frozen when the temperature dips really low.  

So here is how I built my Garden Tunnel:  
First you need to acquire some heavy duty wire.  I got a roll of "9 gauge" at the hardware store.  That is a good gauge.  You definitely don't want it any smaller, but bigger would be great too.  It has to be soft enough for you to curve it into shape, but not too soft.  Make sense? :-)

I have raised beds, about 2 1/2 feet wide, so I cut my hoops 5' long.  That makes a nice height for things like lettuce and baby beets or smaller chard.  If you were just growing lettuce and spinach, you could make your hoops shorter.  Push each end of the wire into the ground to form a hoop.   

Now take some heavy string or baling twine and tie it to the center each hoop making it taut.  This will keep the plastic from sagging in between hoops.  

The plastic I got was a 10' x 25' 3.5 mil clear painters cover in the hardware store and cut it in half legth-wise so I had enough to cover two 20' tunnels.
Cut your plastic the length and width of your tunnel with extra for the ends.  

Now at every other hoop, tie a length of twine to a garden staple (or piece of wire or old hanger bent into a "U" shape) and push it into the ground right beside the hoop.  Pull the twine across and tunnel and tying it to another garden staple push that into the ground next to the hoop on that side.  It should be just tight enough to keep the plastic taut.   (hopefully you can understand what I mean by the pictures)

Make sure the ends are tied together securely.  I use a "U" shaped wire pressed into the earth to hold it down.

Now you can slide up the plastic to give your plants some air on mild days and the strings keep it in place.

I cover my tunnel with old blankets if the temp is going to fall below freezing.  

So there you have it!  A simple, inexpensive garden season extender!  
Unless you are covering already existing plants in the garden, I would recommend starting your lettuce and other plants inside and then hardening them off in an unheated garage or enclosed porch for a few days before moving them into the tunnel.  While they do like the cooler temps to grow in, the soil might be too cold for them to actually germinate.  Same things if you want to add new plants during the winter.  Just start them in a milk carton or some such thing under lights.  They will get the best start that way.  

Faith Ann

Wednesday, November 28, 2012

Covering the Garden

Earlier this year we came across a newly released film called "Back to Eden."  So impressed were we by the contents and ideas in it, that we immediately called all our gardening friends and hosted a movie night.
(click on the picture and go to the website to watch the film for free, or borrow a copy from us!)

The film is about the gardening practices of Paul Gautschi, an enthusiastic gardener and Christian.  Over 30 years ago while struggling with the constant work of keeping up a large garden in an area which got so little water per year, he sought God's wisdom and example as to how He "gardens" in nature.  The answer, he found,  was a Covering.  I could go on and on, but you have better just watch the film.  It is definitely worth your time.

After watching the film this Spring, we decided to make ourselves a "Back to Eden" garden this Autumn.  Actually we just revamped part of our already existing garden. 
 
When we moved here over 5 years ago, we ambitiously cut up a large 30' x 114' section of the lawn and due to the dampness of our property, arranged it into raised beds.  This was just perfect for our soggy garden and has served us well these past years. 


 After  learning that Paul Gautschi's method (or as he would say, "God's method") of gardening worked for water-logged as well as overly dry properties, and acquiring the necessary "covering" (wood chips), we decided to flatten half of the garden rows.  (You can see the wood chips at the top of the garden.) It was a little bitter sweet - destroying something that you worked so hard on for several years, but it was also very exciting to see how this "new" method would work.

After the flattening was complete, we covered the soil with generous layers of chopped Maple leaves and wood ashes (both courtesy of Mr. Reiche), 

a sprinkling of manure (courtesy of our goats and chickens), 

and then the hauling began!  
With Josiah manning the tractor/trailer and Dad and Mom using wheelbarrows - 

 - I was spreading out the wood chips as fast as I could!

The first corner.

They kept dumping, I kept raking,

and the layer kept spreading.

 
I was mostly eyeballing it, but every once in a while I used a ruler to make sure we were approximately at 6". 

The "un- covered" spot grows steadily smaller!

A quick kiss for our helper - Sadie Rose. 

Closing in the gap!

It's starting to get dark so we must move fast- so close!

The last load!  Just enough wood chips!  We scraped up every last bit.

Here is the finished garden. (photo taken today with a little bit of un-melted snow still on it)
We expect that the chips will settle a bit over winter and be about 3- 4 inches by spring; which will be just about perfect.  
We'll have to let you all know how our "Back to Eden" garden goes next year.  And in the mean time, watch Paul's film for yourself!  


~ Faith


Tuesday, November 20, 2012

Sunday Afternoon Strolls

The past two Sunday afternoons, we have been blessed with beautiful weather, just perfect for a stroll out in God's gorgeous and amazing outdoors.

So two Sundays ago three of us children, Josh and Theresa, and Mr. Reiche, packed into the van, along with our two faithful canines, and headed off to Beaver Lake Trails.
We soon realized that our "stroll" was really a full grown hike, but nothing could dampen our spirits, and we trudged on, marveling in the bright blue sky and late November beauty all around us.


A masked woman :)
After much huffing and puffing, we reached pinnacle peak!
We all stopped to survey the land from the summit, and catch our breath before plunging down the hillside.


Her royalty, Miss Baby was carried for several stretches, and seemed quite happy about it :)  (not so Sadie Rose, who darted around in front, behind, with...)
Until I tried to take pictures of her close up...
Being such a gorgeous day, we were not surprised to see other people out and about, many of them on horse back.
We headed back up the trail we came, crossed this bridge which has quite the personality, and headed to our vehicles.
The dogs were happy and worn out, most of the humans were the same, and we once again loaded up and headed homewards, a successful hike behind us.

*****************************************************************

This Sunday was looking to be just as pretty as last and we were about to call our faithful walking companion Mr. Reiche and ask him if he was available for another adventure, when he walked in the door.  Talk about timing :)
For this next trip into creation, we headed to For-Mar Nature preserve.
Barefoot Hiker
The paths here are much wider and more level then Beaver Lake Trails, but just as beautiful and full of interesting pieces of nature.

Since we were in the area we decided to stop by the Foote Bird Museum, and were quite stunned and impressed with all the birds.  It was very intriguing wandering around all the glass cases built 60 plus years ago, full of birds of all sizes types and variety.
There were also cases of eggs.
It really was a fascinating exhibit  and I would have had many more photos of it and the rest of are hike, but....  my camera battery died :(
We are very grateful for these last few hikeable days, yet look forward to winter, with sledding, snowman, snowballs.......

~Chs