Thursday, November 07, 2013

Breathing Sunshine

In our busy lives, there are those times, those certain days, when even though we still have a list of things to do, we step out the door and suddenly realize how refreshing the crisp autumn air is, how soothing the golden sunshine, how delightful the soft fall grass feels.  And then, no matter what else waits, we must stop all and breath in the sunshine...


Saturday, November 02, 2013

Homemade Saturday: Tacos

Tacos.

A wonderful lunch in all seasons, easy, tasty, adaptable.. truly a delightful option for your noon meal.

Throughout the years we have gone back and forth with buying re-fried beans from the store and making our own. Now we are back to making our own and we are staying there!  

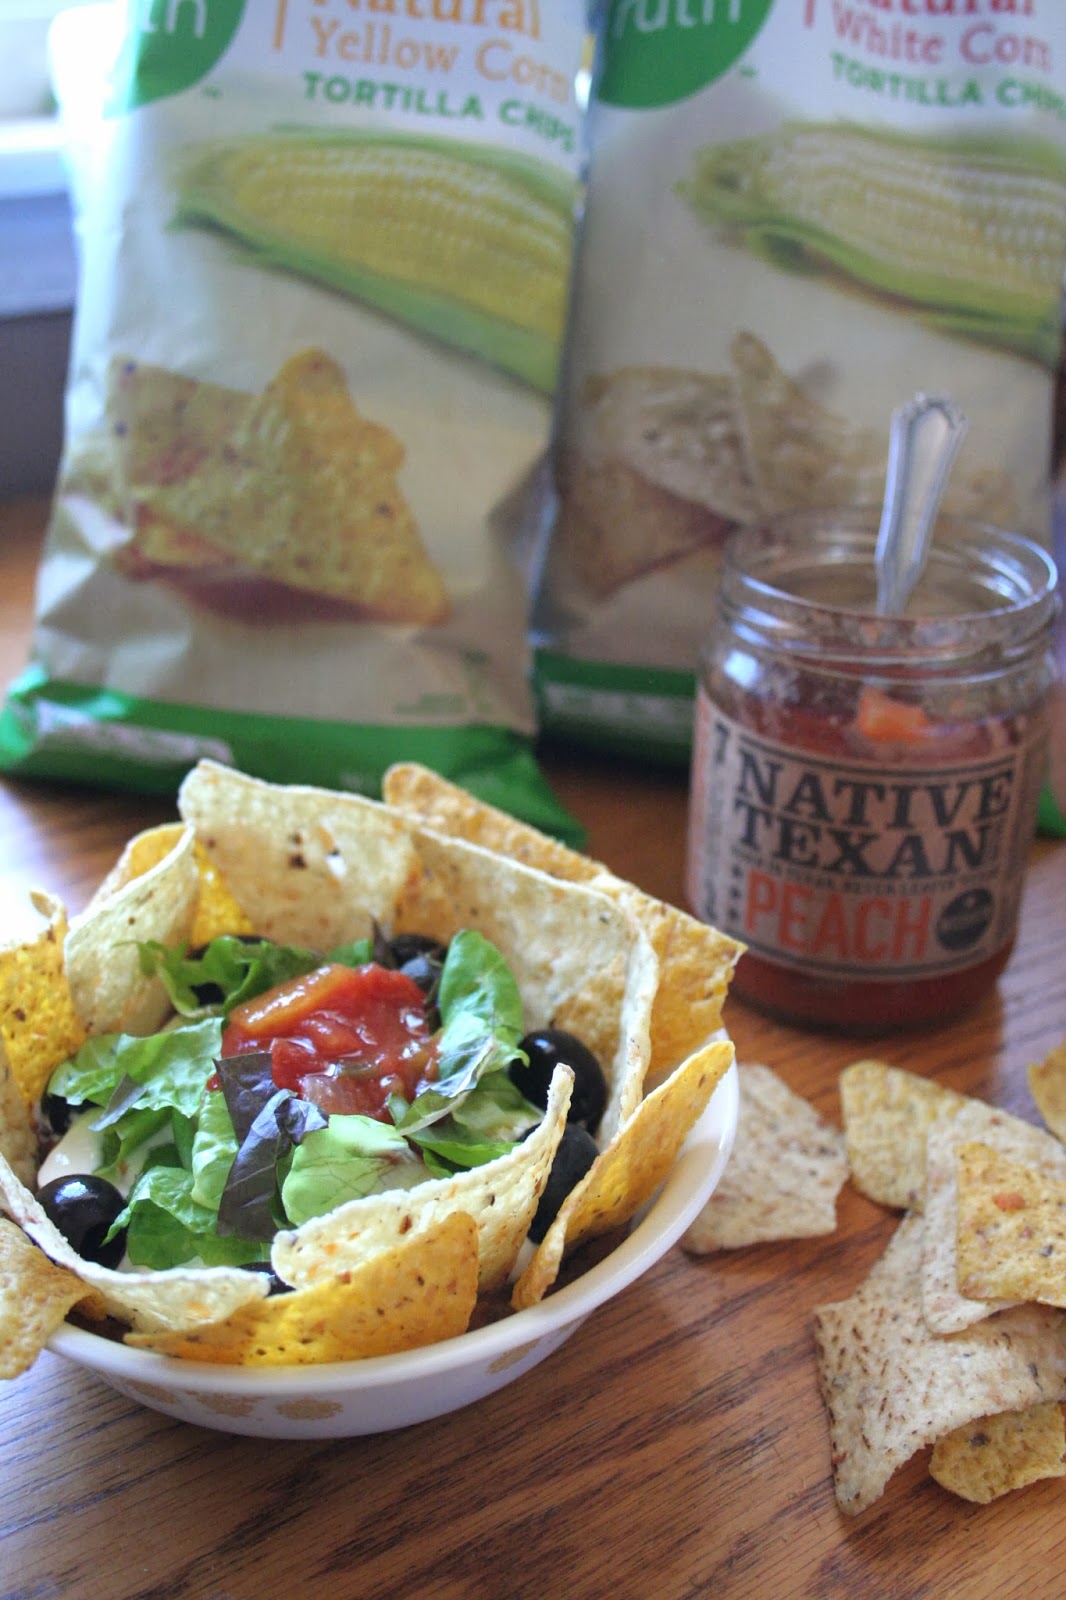
Now to be completely honest, the real reason for this post is not the delectableness of re-fried beans/tacos, but the detailed creativity and artistry of a young man named Josiah Sauve.  Seriously we cannot have this meal without Josiah creating a work of art out of the dish. 

{See what I mean?}

Earlier this year our family was on a grain free diet, and "tacos" were an easy lunch for us.  We simply put our beans in a bowl with the toppings and ate with a spoon.  Since then we have continued to do the "shell-less" tacos, now with organic corn chips on the side.


Re-fried Beans:

The best way to make these beans is to soak them overnight, the day before you want them for lunch.
1. Take 2 cups of beans the night before, put them in a pot and cover them with water.

2. The next morning strain the beans, cover with fresh water and bring them to a boil for 2 minutes then strain the beans and add 2 cups of fresh filtered water.  (all this straining and adding of water helps with digestion of the beans)

3. Add:
1 c. chopped onion
2 garlic cloves minced
1/2 chopped green or red peppers
1 tsp of paprika
1 Tb of oregano
2 tsp coriander seed
1-2 tsp of cumin
1/4 tsp of cayenne (adjust to fit your taste)
2 c. fresh chopped or canned tomatoes
Of course all these spices and veggies are easily adjusted to taste.  Have fun and add hot peppers if you like, or more garlic, etc.

4. Simmer 2-3 hours until beans are tender.  Now add about 2 tsp of salt to taste, and some ground black pepper if so desired.

5. Your beans are now ready to eat, but we like the beans much better if you puree them some. You can pour the beans into a blender then scrape them back out, but it is much easier if you use an immersion blender.

The last step is to plop them in your bowl or on your plate and meticulously decorate it, well at least if you are Josiah.  And it helps if you have relatives who live in Texas and give you a present of some of the best salsa ever.  "Native Texan Peach Salsa" has long been gone but was enjoyed while we had it.

So there you have it.  Go ahead and make a work of art for your next lunch! :)


~Chs

Saturday, October 26, 2013

Homemade Saturday: Almost Winter Snack

It's cold and dreary out. You think you might have seen a snowflake fall down.  Eagerly you press your face to the glass and scrutinize the falling rain, or is it sleet, maybe... snow?
Soon you give up, and turning back to the indoors, your mind begins to think upon a suitable snack for the weather and season.  It's fall still, as the watercolor leaves attest to, but the nip in the air, and the stray sometime imagined snowflake, tell you that this season is soon to be over and winter is to be heralded in.


Hot Chocolate, yes the perfect cold weather snack, and to accompany, something simple... like... Shortbread!  But since nothing should be boring or mundane (not that either hot chocolate or shortbread are at all mundane) you decide to add a twist.  Cool mint Ice Cream to dollop on your hot chocolate. :)  

Now to create.

~~~~~~~~~~~~~~~~~~~~~~~~~~~~~~~~~

First the Ice Cream: I have had fun experimenting with homemade Ice Cream throughout the years, and this is my basic recipe with some mint tossed in alongside the vanilla.

1. Separate 3 eggs, put the egg yolks into a glass quart jar, and the whites into a container for later projects. 
2. Add a 1/3 cup of sugar and a 1/3 cup of maple syrup to your jar. (These amounts are completely subject to how sweet you like your ice cream.) Now, this really works best with an immersion/stick blender; if you don't have one you might have to do this in a blender/food processor.
3. Pour in 2 cups of cream.  This can be done with all cream (a little too greasy for me) or even all milk (a bit more icy), but this seems to be the perfect amount. Once again blend with stick blender until your liquid is all one smooth color.
4. Toss in a dash of salt, 2 tsp of vanilla, and 1tsp of mint (you can up the amount if you like a stronger mint). Blend and then fill up the rest of the way with whole milk. 
5. Slip the jar into the fridge and let it sit for 15-20 min. while you make up the Shortbread.

~~~~~~~~~~~~~~~~~~~~~~~~~~~~~~~~~~

Shortbread is SO simple to make, 3 ingredients. Uhuh! That's it!
1. Mix together 3/4 cup of butter (softened if possible) 1/4 cup of sugar and 2 cups of flour.  It will be stiff and dry but keep mixing and if necessary add 1-2 Tbs more of butter to help it hold together.
2. Roll the dough to 1/2 inch thick on a lightly floured surface and then cut out into desired shapes -  leaves, hearts, snowflakes... you get the idea!
3. Place on an ungreased cookie sheet and slide them into your 350 degree oven for about 20 min.

~~~~~~~~~~~~~~~~~~~~~~~~~~~~~~~~

Now, put a 6 cup glass dish into the freezer.  This is a CRUCIAL step... which I always forget.  It will help SO much when you are ready to scoop out your ice cream into your dish... it won't melt.  Alright, with that very important item taken care of, get out your ice cream maker and after removing your jar of liquid from the fridge and shaking it to make sure there is no sludge on the bottom, pour it into your machine. (and turn it on :P)

~~~~~~~~~~~~~~~~~~~~~~~~~~~~~~~~

Your cookies are almost done baking, the ice cream is freezing, the only thing left is your hot chocolate and then you may enjoy your well deserved dessert;  and trust me, this is taking way longer to explain and type out then it does to create in real life.

 1. Melt 1-2 Tbs of butter in a medium pot, add around a 1/4-1/3 cup of cocoa powder (this is completely up to your taste and how strong you want your hot chocolate), 1/3 cup of sugar (again, sweet tooth? increase the shugaar!) and around a scant cup of water (alright, confessions, I never measure that part).  Now stir with a whisk till smooth and bring to a boil.
2. Once boiling, pour in around 5 cups of milk (start with less, taste test and add more for desired flavor... make it your own!) and 1-3 tsp of Vanilla.  Heat to nearly boiling, hotter than you want to drink it.

~~~~~~~~~~~~~~~~~~~~~~~~~~~~~~~

Now. we. are. ready!!  By this time your cookies are out and cooled, your ice cream is in your chilled dish in the freezer.  Everything is just right.  Pull out your favorite mugs and fill 3/4 full with steaming hot chocolate and then take a scoop of mint ice cream and plop it on top and place a few cookies on the side...  Voila, a snack fit for kings and queens!


There is only one flaw to this nearly perfect dessert.  The ice cream cools the chocolate down a little to fast, but hey, I can work with that for the flavor! :)

~ Chs

PS. this makes enough for 6 sweet hungry people (with just enough beverage left over for the nearly 7ft tall boy to have seconds).

Friday, October 25, 2013

The Chicken and the Egg

This, is Cosette.  She is one of the chicks we hatched out ourselves this spring, and she is absolutely gorgeous!

  
Her mother is a sweet French Blue Copper Marans, named Clairette, who lays dark chocolate brown eggs. Cosette gets her beautiful blue-grey feathering, and feathered legs from her mother.


Her father was a mean tempered but stunningly feathered Splash Easter Egger named Rusty whose ancestors and relations laid blue eggs.  Cosette inherited her voluminous beard, her rust colored necklace, and other rusty shading from her father.


 So the reason behind all this somewhat boring and obscure lineage of our chicken (I know you thought I was going insane) is that Cosette, whose official breed would be an Olive Egger, just started laying eggs.  They are a beautiful olive/sagey green color.   .  .   Okay it depends who you ask, Faith says they're pukey green.... :P  

~ Chs

PS. and for those that are still interested in random chicken facts, the egg is actually blue with a brown over coating, so if you scratch it.. you see blue!... alright, I'm all done. :D


Monday, October 21, 2013

Homemade Saturday: Lentil Soup

Right, so I know it's Monday already, and it may not be a great idea to start something new, late.  But I was busy on Saturday, and while I got this started I didn't find the time to finish it.  So, without further ado, here is the first Homemade Saturday post... on Monday.

This time of year, when the wind starts shifting to the north, the geese start flying south, the temperature starts dropping, and the possibility of snow rising, my ideas for lunches become more and more along one track.

Soup.

There is something so comforting, homey, filling and cozy about a warm bowl of soup (especially when sitting beside a piece of warm bread which is buried in homemade butter)  One of our more recent favorites, and one of the quickest to do when it's 11:00 and you need to think about lunch is Lentil Soup.  I LOVE lentils.  And was delighted when our friend and neighbor sent in this recipe to the children's paper that I edit.  I tried it, fell in love with it, adopted and adapted it to be my own, and made it as often as I possibly could!

1. First things first.  Melt a 1/4 cup of fat in a pot.  This could be anything from, butter, bacon fat, or chicken fat.  The last being my favorite.
2. Add 1 finely chopped onion, and 2-3 garlic cloves minced.  Saute until quite soft.  I enjoy the flavor, not the crunch.

3.  Next the important part.  Your Lentils.  Now I am a bit of a lentil snob.  Any lentil would do for this recipe, green, red, big little. BUT. I love french green lentils.  Don't even ask me why, I just do.  So, while your vegetables are sauteing you should sort and rinse your lentils.  Now, I have never done this, and have punished my family with little gritty stones in their soup...
Your amount of lentils depends on how thick you like your soup.  I like to stick to around 3 cups.

4.  Once your vegetables are soft enough add the lentils, 8 cups of broth (chicken or turkey), water would work too, but I like the richness the broth lends. Then add 1 tsp of cumin.

5.  Simmer your soup for 30 minutes or so (when I was rushed I was able to do it in 20) until your lentils are tender, and your soup is beginning to thicken.

6.  These next additions are optional but delicious! Greens: Spinach is a wonderful option and if it isn't the season for fresh, organic frozen works well, Swiss Chard is also wonderful, and anything else like it.

7.  Meat: Turkey Sausage is my personal favorite (our homemade) but you can also use ham (as I did this time) bacon, or any other meat you think will work.

8. Throw in your greens and meat, then add 1/4 cup of lemon juice (this is essential to the flavor) 2-3 tsp of salt (I never measure, it's just to taste) and plenty of pepper.

Taste, serve and enjoy!!

~Chs


Friday, October 18, 2013

Harvest Days

It is a wonderfully busy, satisfying time of year!!  Here at Lily Spring Gardens and Farm harvest is in full swing.
One of our very own apple trees (the Jonathan) produced for the very first time!  So we made an apple pie in celebration!

Faith has been the canning queen around here.  All the jars in the picture (and some I didn't get) were part of one day's work!! Pickles, apple jelly, apple sauce, canned pears, and more!

The gardens are all winding down and are only waiting for us to have time to clean them out and put them to bed.  One fine October day (which we have had quite a few of recently) Mumsie, Faith and I harvested the squash and dry bean patch.


{Gourds}

Butternut squash is one of our favorite winter side dishes!!  We love this squash, and have never been able to grow enough.

Spaghetti squash is our next staple.  Wonderful for gluten free spaghetti!

Almost completely hidden by the squash vines were our Jacob's cattle beans. These are adorable spotted dry beans which are SO photogenic. :)


 {“The harvest truly is plentiful, but the laborers are few.  Therefore pray the Lord of the harvest to send out laborers into His harvest.”}


~Chs

Monday, October 14, 2013

Fall Raspberries

 While our raspberries didn't perform very well in the summer, this second fall bearing has been magnificent!
Every other day (or when we remember) we go out to our happy patch and pick nearly a quart of juicy red jewels.

{little froggy joined us picking one evening}


{delicious} 


Very thankful for this lovely harvest of berries this fall!

~Chs

Wednesday, October 09, 2013

Last Birthday of the Year

Last Monday we were privileged to celebrate the last birthday of this year for our family.  Charity turned 31.  And while the day was a little fractured and busy and the cake was a bit of a flop, we still had a delightful party celebrating our first born, beautiful, extremely smart sister and daughter.

{the "flop" peanut butter chocolate torte}

Charity is our numbers person, and computer whiz.  Whether it is formulating chicken feed, fixing a frozen computer screen, or finding out some random fact, the name most often heard would be --Charity!
Praying that God would bless her with many more years, and improving health as those years go by.

~Chs